Expert Cleaning Service Winnipeg: Your House's Buddy
Wiki Article
Deck Discoloration Made Easy: Step-by-Step Guide for DIY Enthusiasts
Are you a DIY enthusiast wanting to give your deck a fresh makeover? Look no more! In this detailed overview, we will stroll you via the procedure of deck discoloration. From preparing the surface area to applying the tarnish, we have actually got you covered. With our easy-to-follow directions, you'll be able to change your deck right into an attractive exterior area quickly. So get your tools and also let's begin!Preparing the Deck Surface Area
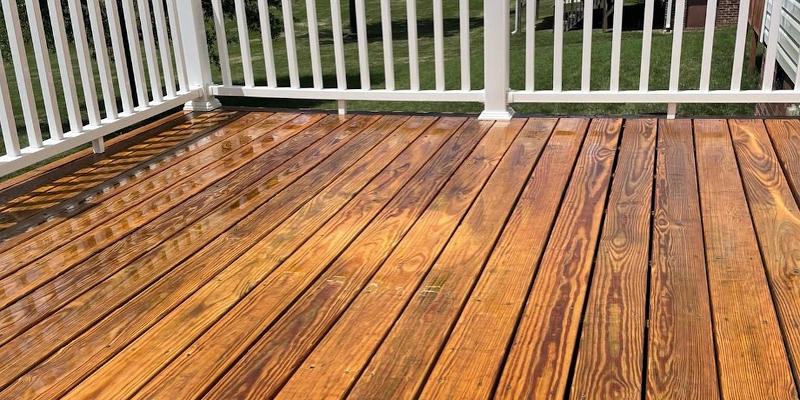
Before you begin discoloring the deck, make sure you're effectively cleaning up as well as fining sand the surface. This action is vital in making sure a smooth and long-lasting surface. Begin by getting rid of any furnishings or plants from the deck. Sweep away any kind of loose dirt or particles making use of a broom. After that, utilize a power washing machine or a hose with a high-pressure nozzle to completely clean the deck. Pay attention to locations with persistent spots or mold, as well as make use of a deck cleaner or a mixture of cozy water as well as mild detergent to treat them. After cleansing, permit the deck to dry entirely for at the very least 24-hour.As soon as the deck is completely dry, it's time to sand the surface area. Grab a portable orbital sander or a fining sand block, as well as start sanding the deck boards in the instructions of the wood grain.
Picking the Right Stain
When making a decision on the proper stain, you'll desire to think about the type of timber you're working with. Various types of timber have various features that can affect how well they soak up the stain.In enhancement to the sort of timber, you must also take into consideration the color you desire to accomplish. Discolorations are available in a range of shades, from light to dark, and also can drastically change the look of your deck. If you're seeking to enhance the all-natural color of the timber, choose a transparent or semi-transparent tarnish. These allow the timber grain to reveal with while including a refined hint of shade. For a much more significant effect, decide for a solid or nontransparent stain, which will totally cover the timber and provide a strong, consistent color.
Last but not least, consider the level of defense you desire for your deck. Stains with higher degrees of pigment have a tendency to give better defense against UV rays and moisture. If your deck is exposed to extreme climate condition, it's worth purchasing a stain with added protective high qualities.
Cleansing and Repairing the Deck
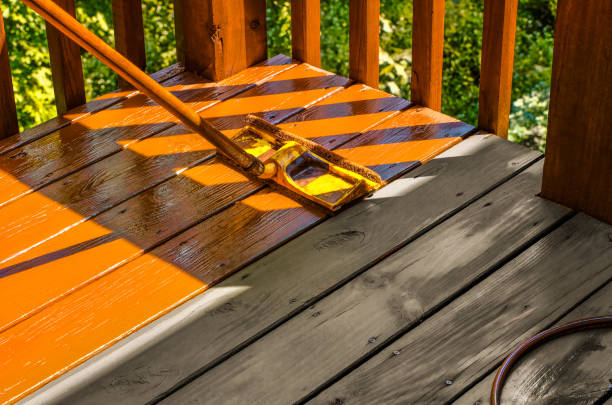
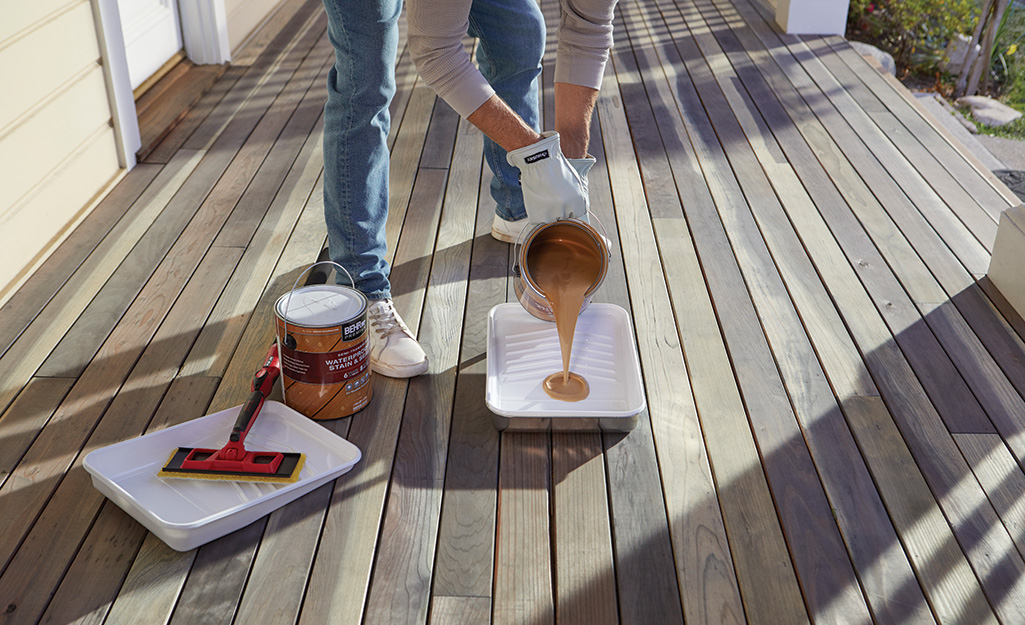
Using the Spot
Completing Touches and also Maintenance Tips
After using the final layer of discolor, it is very important to on a regular basis tidy and secure your deck to maintain its appeal and also safeguard it from the components. Cleaning your deck should come to be a part of your regular upkeep regimen. Make use of a mop or fallen leave blower to get rid of any kind of dust, leaves, or debris that may have built up on the Look At This surface. For a much deeper tidy, you can utilize a power washer, however beware not to make use of way too much pressure as it can damage the timber. Once the deck is clean, it's time to secure it. Pick a premium sealant that is specifically designed for decks and also use it according to the maker's directions. A sealant will not just safeguard the timber from wetness and also UV rays, but it will additionally improve the shade as well as surface of the tarnish. It's suggested to apply a new layer of sealer every 1-2 years to maintain your deck looking its best. By consistently cleaning up as well as securing your deck, you will certainly prolong its life-span as well as guarantee that it continues to be a beautiful and also inviting exterior area for years ahead.
Conclusion
Report this wiki page